kw: microscopy, photomicrography
I entered science fairs from sixth grade right through high school. For most of them I displayed my gradually increasing skills in photomicrography. At that time (1958-1964), I used a rangefinder 35mm camera on a tripod, adjusted to shoot through the eyepiece. The lens was fixed focus (zoom was extremely rare and costly), 38mm. I had to turn the camera away to set up each new shot, then reset it. The camera's focus would be set to infinity. I first learned lighting and exposure, then developed my skills in microtomy and specimen preparation. My junior year of high school, the science teacher actually paid me to take photos of many of his standard slides so he could show them to the students without using the cranky projection microscope the school had. The pictures I made in those days all looked similar to this first image, made with a point-and-shoot camera, handheld (!).
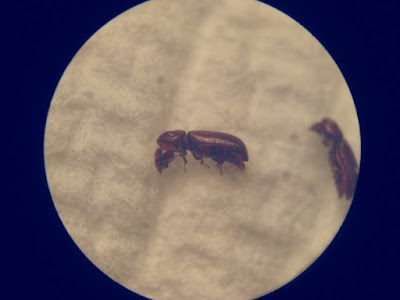 Canon SD1100 IS, f/2.8, 1/125 sec., 1x zoom. Microscope 20x.
I've wanted to get back involved with photomicrography for some time. When I had a working 35mm Yashica SLR, I had a T-mount adapter for it, and did some work with that setup. My digital Nikon SLR will not work with a T-mount adapter. I tried shooting through the lens, but the vignetting is too severe; there is no way to get the entrance pupil (diaphragm) of the camera lens anywhere close to the exit pupil of any of my microscopes.
My son took off for a couple days at school (he's taking a 2-day-per week class) and left his camera behind. It is a point-and-shoot, specification given above, with its 3x zoom lens working in the range 6.2-18.6mm. The focal distance of the 10x eyepieces on the inspection microscope is 25mm, and the eye relief (distance from lens housing to exit pupil) is 20mm, so this seemed ideal. It is!
The specimen is a rice beetle (more on this below). Directly scaled, its length is 2.7 mm. On my 100 dpi screen the image above has the critter's length as 27mm, so this is a 10x view. Click on the image to get a larger one that is quite close to 20x. The original image is 8Mpx, 3264x2448. I reduced it by 4x to 816x612 (the image you see by clicking), and this view is 400x300, set by the Blogger software.
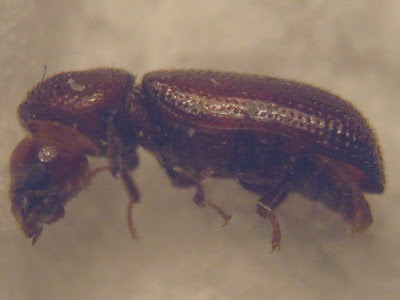
This (click to see full size) is an 816x612 crop from the image above, to show the detail in an unreduced image. This is about 40x, and the full size is about 80x, on a 100 dpi screen.
There is reasonable depth of field. The ornamentation on the beetle's back (the
elytra) is beautiful. Only one claw is in focus. The eye appears as a dark bulb, no detail visible.
This beetle is one of a few dozen that showed up when we boiled some old rice. My wife called me to the kitchen to ask what the little black specks swirling in the pan were. I scooped a few out with a spoon and went to the microscope. She was not too happy that they were beetles!
The beetles were floating, and the rice sank, so we swirled the water and scooped them out, several times, until we could find no more. They have sat under my microscope for a couple of months.
A nice thing about modern cameras is that so many now come with good zoom lens optics. The next two images show what is possible with this particular model.
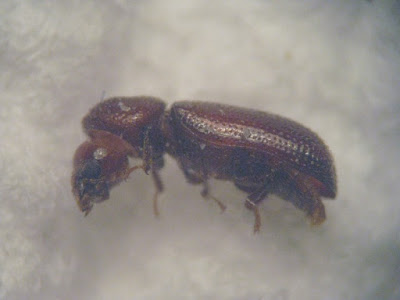 Canon SD1100 IS, f/4.9, 1/79 sec., 3x zoom. Microscope 20x.
This image is very close to 30x. Click on it to see the 60x original. The Ramsden circle (image of the field-limiting diaphragm in the microscope eyepiece) has been zoomed out beyond the image area. Comparing this with the 40x image above, it is apparent that the depth of field here is a bit less. The
elytrum ornamentation is still quite clear, but some details around the body are not as well delineated.
By the way, all of these have been color-adjusted for a white background. The automatic color balancing in both Canon and Nikon cameras does a poor job of compensating for incandescent light, and produces yellow-orange images. I know how to force better color balancing in my Nikon SLR, but I'll have to do some reading in the manual to find if this Canon can be "told" to compensate for incandescent light.
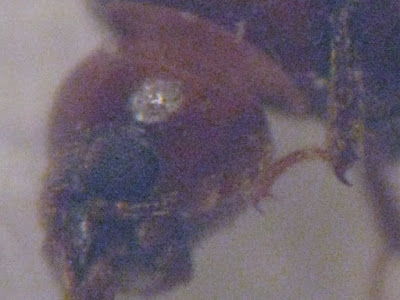
This (click for full size) is an 816x612 crop from the image above, showing details on the head. The eye lenses are visible, though not as distinct as I'd like. I suspect, using a tripod or other mounting, that I can force a lower ISO (It was using ISO 120) and slower shutter for less color jitter in the image.
The effective magnification of this image is 120x, and of the full size crop, 240x. That's pretty good for beginning with a 20x setting on an inspection microscope. For making prints, the effective magnification depends on the sort of cropping I do before printing. The kiosk printers at the local drug store print at 200 dpi. If I prepare 1200x800 images for printing at 6x4 inches, I'll get maximum resolution. Starting at the top, then, I would take the 3264x2448 original, which produces about 20x at 100dpi, crop the top and bottom to get 3264x2176 (for a 3:2 ratio) and reduce it to 1200x800 to get a 10x image on the paper print.
Cropping out a 1200x800 piece is the same as a 2.7x magnification, so I'd have a 27x print. The 3x zoom images would then print at 30x and 80x.
Now that I have seen what is possible, I'll investigate the optics of PnS cameras similar to this Canon, and get one for which I can make some kind of mounting (they have a 1/4-inch threaded tripod mount). Also, when pond water is the subject, there's something these cameras can do that 35mm can't: video!
 Next I tried a small square containing other squares. My initial attempts were aimed at having the smaller squares be 0.1mm (100µ), but after various tests, I settled on the square being 2.5x2.5mm, with the small squares being 250x250µ. If you click on this image, the larger image you'll see has a magnification of about 52X. This one is closer to 15X. The target insect is a midge about 1.2mm long in body, with legs approaching 2mm long:
 This last image is a 1x1mm clip from a more highly magnified original, centered on the midge's head. At this magnification, 1mm = 480 pixels, so if you click on the image below, the larger version, being 480 pixels across, will occupy 4.8 inches on your screen, or a magnification of 122X:
 With this microscope, at least, handheld photomicrography works pretty well. I am considering a jig that will screw into the tripod mount and attach to the microscope tube, so I can get more repeatably aimed results, and even make short videos (like of the critters in my birdbath). But for most purposes which I use this microscope, this method is sufficient.


 Posts
Posts

