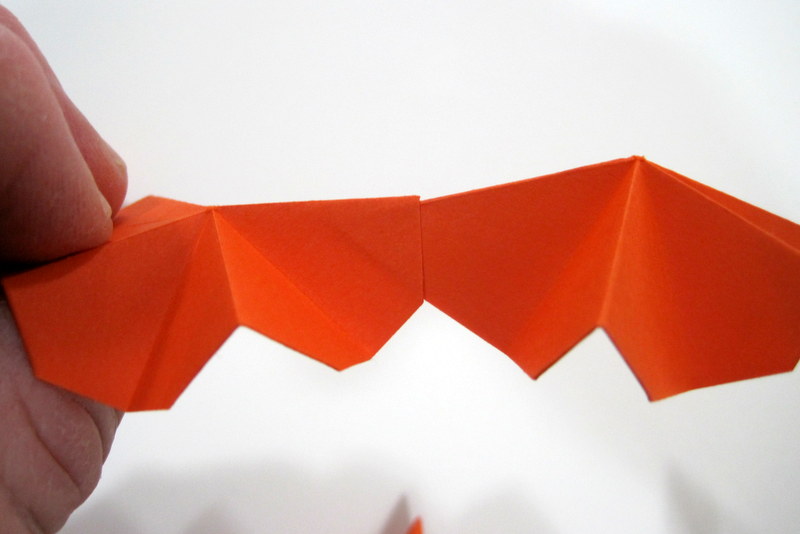
Showing posts with label origami. Show all posts

Thursday, February 28, 2013

Constructing a folded paper skeletal Icosahedron

kw: crafts, origami, solid geometry, polyhedra, mobiles, photographs

This long post has many pictures, showing a technique I learned for making attractive shapes based on Platonic and Archimedean solids. The shape chosen here is the Icosahedron, but I call it "skeletal" for reasons you'll see once it is complete.

For this technique, we use folded paper shapes as the vertices of the chosen polyhedron's skeleton. All the shapes of interest have either 3, 4, or 5 edges radiating from a vertex. Most have vertices of the same type, as does the Icosahedron, but some shapes have more than one type of vertex. I find the Icosahedron interesting because its vertices have 5 edges. I earlier made one using cut-out, 5-pointed stars, which will be seen at the end of this post. This time I did an experiment using a "puckered star" made by adding a corner to a square. Such a "square" will not lie flat; it becomes a 5-pointed star with extra paper in it.
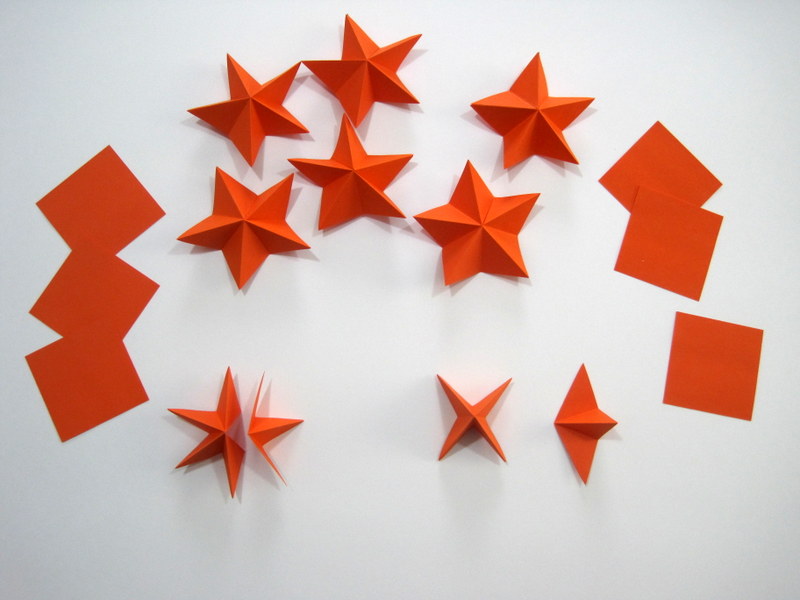
Six such stars are at top center in this image. It takes twelve to make the Icosahedron.

Three squares are needed to make two stars, so the project starts by cutting 18 squares. At bottom, two squares have been folded into the Origami base fold: corner to corner both ways folded from one side and then edge to edge folded from the other side, to make a 4-pointed star. One of these stars is cut along the diagonal to make the extra material to be inserted in the other two.

At lower right, one 4-pointed star is shown next to the extra point with its "wings" which are used for gluing. At lower left, the other star is shown with its side cut open so the point can be inserted. The next image shows these in closeup.


I use a glue stick. You could use any adhesive you like, so long as it is long-lasting. I think you can see how the extra point will go in the cut-open star on the left. I put the "wings" inside the shape. That makes it easier to line things up when gluing and holding.

OK. It would be possible to simply glue these with a little corner overlap on the points, but the original technique, for another shape, used a pocket fold to fit one point inside the other. The next pair of images shows how I prefer to set up the pocket.

On the left, one pocket was formed by folding the tip 1/3 of the way to the center. This is easier than you think, because when it is folded, the tip is halfway to the center from the fold. On the right, the first puckered 5-pointed star has had pockets folded on all 5 points. We are looking at the "bottom" of these stars, the side that will be inside the finished shape.

Let's think about this a minute. A point that has not been folded into a pocket will be inserted and glued into a point that has. Five points each on 12 stars means there are 60 points, so we need 30 to be folded and 30 to be left unfolded. We will have to take care not to fold too many or too few as we go. For starters, I made the one on the right to have all five points folded in, and five more stars with just two adjacent points folded in.

Here are the first six stars ready to glue. The 5 pockets on the central star plus 2 on each of the others totals 15, or just half of our total need for pockets. They are arranged in a way that you can see how each one will fit into its neighbor.

This is how one of the non-folded points on a star fits into the pocket in the central star.
This is how I hold them; I put some adhesive on the unfolded point, hold it in line inside the pocket, and give it a squeeze.

It takes a little care to put each star on the central one in the right orientation. We want them to each fit into its neighbor.

On the left, the five have been glued just to the central star. In the middle, they have been joined together, as seen from above; on the right as seen from below (inside). The shape is already half joined. Once this was done I did some more thinking about how to distribute the remaining 15 pockets.

On the left, the pockets on the glued shape are pointing clockwise, and the unfolded points are pointing counter-clockwise. I realized that the five surrounding stars (all but one of those that remain) could be "pocketed" as shown, with three points each folded into pockets. The last star will have no pockets. It will fit into five pockets that will wind up pointed toward its location.

So now the five 3-pocket stars have been added to the shape in the right orientation. They need to be joined together. You can already see that there will be five pockets pointed at the last star's location.

Look carefully. This is ready for the last star to be added. This one is the hardest. The shape has been rather flexible, but by this point is rather stiff. As each point of the last star is glued in, the next gets just a bit harder to put into place. Fortunately, even with the last point, there is enough flexibility so it can be coaxed into position and held tight so the glue will stick.

This is the final shape, shown looking right down on a vertex. This is a stereo pair for crossed eyes. You need to look at the left side with your right eye, and the right side with your left eye.

This stereo pair is looking more equatorially at the shape. This is the way the Icosahedron is usually pictured.

The actual Icosahedron is formed of 20 triangles, which fill the space between the edges that go from vertex to vertex. Here, we have made a more complex figure based on the geometry of the Icosahedron.

The reason I tried out using puckered stars was to make a shape with more "meat" inside the edges. This green one was made from flat 5-pointed stars. Even though I had a program to print the star shapes on the green paper, it was a tedious matter to cut them out. Their slender shape made a more skeletal look to the final piece.

I folded each star five times, from a point to an inside corner, then back-folded the shorter limb of each fold to get the 3D star shape that is so familiar.

I also didn't use the same method to fold the pockets. I wanted a little angle to the "edge" (which is now a dihedral), so I folded each point almost to the center of the inner fold, then turned it inside. Thus, when the unfolded point is inserted into the pocket, it doesn't line up the same way but has about a 10° angle. I think it makes the final shape prettier.

As I said, the vertexes of other shapes can have 4 or 3 edges. The square is easiest to use to make a shape. The yellow item on the left, based on an IcosaDodecahedron, is the first shape I learned to make, and uses square pieces. It is quicker to make, though it uses 30 squares.

The blue one on the right was made using triangles, and is based on Buckyball geometry. It uses 60 triangles. There is an Archimedean solid with 90 vertexes, but I haven't mustered the ambition to try to make one!

Shapes like these can be displayed by themselves, but I like to make mobiles, and these are light so they make ideal mobile danglers.
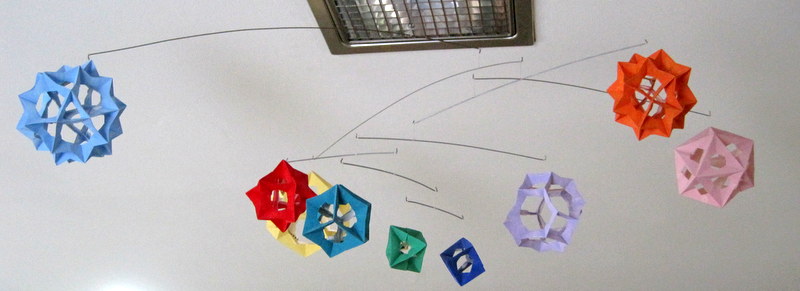
I made this mobile a couple of years ago. The pic is looking up at it. I made it so all the shapes are nearly in the same plane. Sorry, one is hiding behind. The blue one on the left is the IcosaDodecahedron. The Icosahedron on the right (pink) was made differently than either of the two I have shown above, using fatter stars, but still flat. A couple of the shapes mix vertices with 3 and 4 corners. That is a bit tricky to put together!

Thursday, April 03, 2008

Spiky Edge Polyhedron Origami Module

kw: instructions, origami

This is the most colorful of the shapes in my new mobile. It is made of sixty origami modules in several colors. I was taught how to make the modules by a young friend. I have not seen this type of module on any modular origami web sites (and there are many), so I'll show how it is made here. A later post will show how to assemble modules into polyhedral shapes.

I use colored paper, rather than "origami paper", because this module totally hides one surface of the paper, so the bicolored stuff doesn't matter. For the purposes of this lesson, however, I use colored squares I made on a laser printer, so it will be easier to show which side we are working on and how the original edge gradually disappears inside. I'll use four pieces: the red one to show the basic module, and the other colors to show variations needed to get different angles, which is important because certain shapes need modules with a narrower or wider connection angle.

Image 1. You may have heard the terms "mountain fold" and "valley fold." These are defined in a few different ways. Here we will use the terms according to how they look at the time we will use the piece. A valley fold has its crease at the bottom of a "V", and a mountain fold is the opposite. This shows the result of folding the paper, color side up, corner to corner to make a valley fold. Do this in both diagonal directions.

Image 2. Then open the paper, turn it over, and fold opposite edges over one another. Fold one way, then the other. These square folds are in the opposite sense of the diagonal folds.

Image 3. Now open the paper so that the diagonal folds are mountain folds, and the square folds are valley folds. If you are using one-sided paper, the colored side should be down at this point. This is now the "basic fold" with which many, many origami figures begin. Talented practitioners can make this fold in just two operations. I can't!

Image 4. Next, with the paper in the orientation above, fold one corner almost to the center and crease it. This will be the result. Also fold over the opposite corner.

Image 5. Then fold the paper in half so the valley fold showing on top of the colored corners is reversed. This shows the paper held in that position.

Image 6. Now turn the paper so you can bring those two corners inside, and also press in the two other corners that you didn't fold back. It will look like this when lain down.

Image 7. Bring newly-formed corners together, without making any new folds, so the paper is in this shape. The corners you folded are now inside.

Image 8. Now we introduce the asymmetry needed to make the modules attach to one another in sequence. The open tip becomes the vertex of a new fold on one side only. The fold I made here is for "right handed" modules. All the modules to make one shape have to have the same handedness. So fold the outer edge of one side to the center fold as shown. This is one kind of "lily fold" or "petal fold." Turn the piece over and repeat. Do just two, not four. We are not making petals.

Image 9. This shows how the piece looks when opened to show the internal folds. We have to reverse two of the three folds made in each of the two operations, when we did the two petal folds.

Image 10. This shows just the two inner folds of one petal fold reversed.

Image 11. Same orientation as Image 8, showing how the fold is now inverted. Do both petal folds.

Image 12. Turn both petal folds so that the formerly partly hidden surfaces are revealed. Now we are ready to make the locking folds that hold it all together, form the pockets for the tabs, and expose the tabs.

Image 13. The tip of the petal is folded back to the corner that is the center of the paper and creased. Here one side is done. Do both.

Image 14. The piece is opened to show the inside from the "bottom." The newly folded parts will be tucked into the space shown to lock everything together. The corner below will tuck in and hold the "wiggle" on the left, which is part of the petal fold on that side. The corner above will tuck in and hold the "wiggle" on the right.

Image 15. Fold one corner back around the whole piece as shown, so it is prepared to be tucked inside.

Image 16. This shows the corner tucked in, holding one "wiggle", with the other "wiggle" showing.

Image 17. I fold over, then curl the second corner a little to make it easier to tuck in. Here it is shown half tucked in.

Image 18. Almost done. Note that you can see the pocket for one tab. The other is on the opposite side.

Image 19. Fold back the tabs away from the pockets. This is a finished piece.

The "pole angle" for this piece is 112.5 degrees (with a degree or two of slop, depending on carefulness of technique. Paper is forgiving). The variations I'll now show allow us to vary the "pole angle" from 108° to more than 130°. Shapes with many modules tend to need smaller "pole angles." Now to define it: the pole angle is the angle between a polyhedron's edge and an imaginary pole protruding from the center of the polyhedron, through the join between one edge and the next.

The polyhedron at the top of this post is shown looking almost right down one pole. Four edges meet at the vertex through which that pole protrudes. This particular shape has ten modules going around a great circle of the inscribed sphere, so each sits at a 36° angle to the next. This leads to a pole angle of 90°+18° = 108°, which is far enough from the 112.5° pole angle of the "original module" to cause trouble.

Image 20. These pieces are shown in the basic fold, colored side up so the diagonal folds show as valley folds and the square folds show as mountain folds. You'll begin by working on the non-color side, as before.

Image 21. Here all three are ready to make the petal folds. At this point they are all the same.

Image 22. The petal folds make the difference. For the orange piece, the fold was made across the center line such that the folded edge and the folding edge have the same angle at the outer corner. This will make a module with pole angles of 108°. The green piece is folded only halfway to the center, getting ready for pole angles of almost 124°. The blue piece is folded on-fourth of the way to the center, preparing for pole angles of just over 129°. This is the largest practicable pole angle. The absolute limit is 135°, at which point the tab size is zero.

You may also use two-thirds or one-third the way to the center for pole angles of 120° and 127.5°.

Image 23. Here the inner folds have been inverted. These are ready for turning. The orange piece in particular, must be turned carefully so the inside corner of the petal fold doesn't get crumpled.

Image 24. The three pieces ready for locking folds.

Image 25. The first locking fold on each has been made.

Image 26. The four modules finished, showing how the four angles appear. I turned them to emphasize the tab pockets with shadows.

Once several modules of the same angle are completed, and the tabs bent back, you can begin to see how they fit together to make the polyhedral shapes. This will be covered in a later post...it may be a while, it takes a lot of modules to make most shapes.