This long post has many pictures, showing a technique I learned for making attractive shapes based on Platonic and Archimedean solids. The shape chosen here is the Icosahedron, but I call it "skeletal" for reasons you'll see once it is complete.
For this technique, we use folded paper shapes as the vertices of the chosen polyhedron's skeleton. All the shapes of interest have either 3, 4, or 5 edges radiating from a vertex. Most have vertices of the same type, as does the Icosahedron, but some shapes have more than one type of vertex. I find the Icosahedron interesting because its vertices have 5 edges. I earlier made one using cut-out, 5-pointed stars, which will be seen at the end of this post. This time I did an experiment using a "puckered star" made by adding a corner to a square. Such a "square" will not lie flat; it becomes a 5-pointed star with extra paper in it.
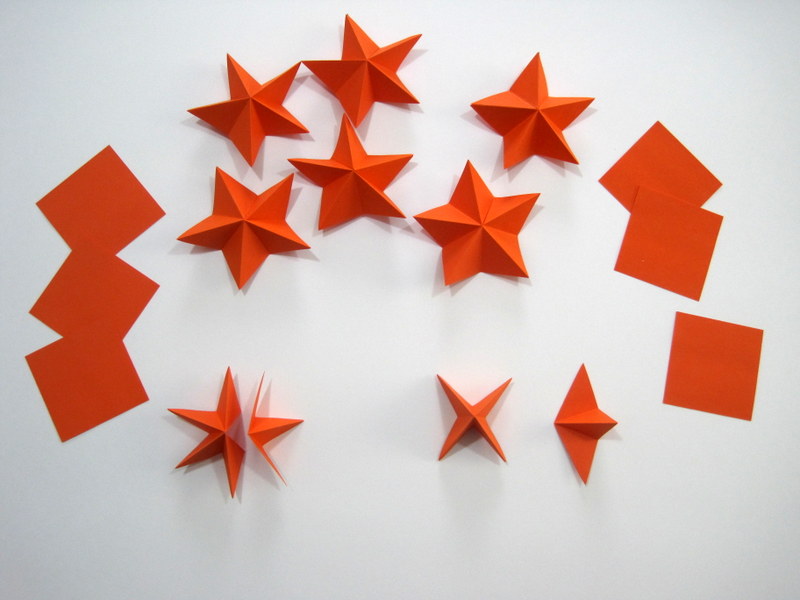
Three squares are needed to make two stars, so the project starts by cutting 18 squares. At bottom, two squares have been folded into the Origami base fold: corner to corner both ways folded from one side and then edge to edge folded from the other side, to make a 4-pointed star. One of these stars is cut along the diagonal to make the extra material to be inserted in the other two.
At lower right, one 4-pointed star is shown next to the extra point with its "wings" which are used for gluing. At lower left, the other star is shown with its side cut open so the point can be inserted. The next image shows these in closeup.

I use a glue stick. You could use any adhesive you like, so long as it is long-lasting. I think you can see how the extra point will go in the cut-open star on the left. I put the "wings" inside the shape. That makes it easier to line things up when gluing and holding.
OK. It would be possible to simply glue these with a little corner overlap on the points, but the original technique, for another shape, used a pocket fold to fit one point inside the other. The next pair of images shows how I prefer to set up the pocket.

Let's think about this a minute. A point that has not been folded into a pocket will be inserted and glued into a point that has. Five points each on 12 stars means there are 60 points, so we need 30 to be folded and 30 to be left unfolded. We will have to take care not to fold too many or too few as we go. For starters, I made the one on the right to have all five points folded in, and five more stars with just two adjacent points folded in.


It takes a little care to put each star on the central one in the right orientation. We want them to each fit into its neighbor.


The actual Icosahedron is formed of 20 triangles, which fill the space between the edges that go from vertex to vertex. Here, we have made a more complex figure based on the geometry of the Icosahedron.

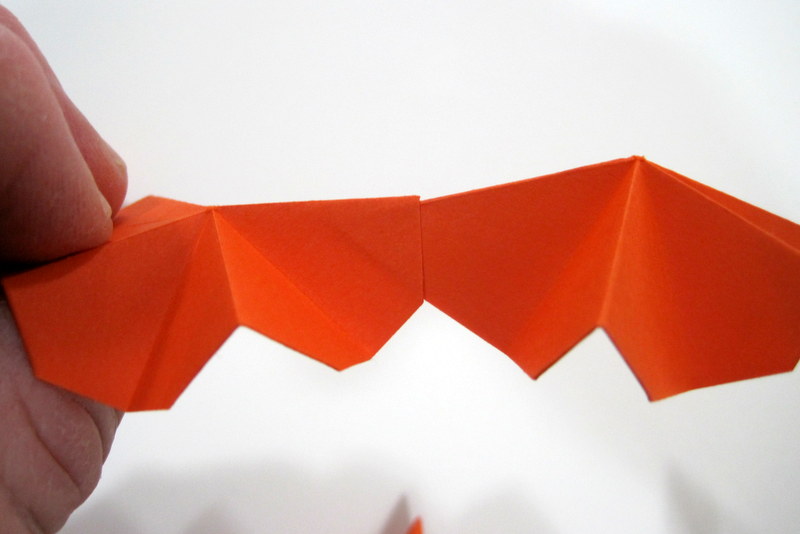
I folded each star five times, from a point to an inside corner, then back-folded the shorter limb of each fold to get the 3D star shape that is so familiar.
I also didn't use the same method to fold the pockets. I wanted a little angle to the "edge" (which is now a dihedral), so I folded each point almost to the center of the inner fold, then turned it inside. Thus, when the unfolded point is inserted into the pocket, it doesn't line up the same way but has about a 10° angle. I think it makes the final shape prettier.

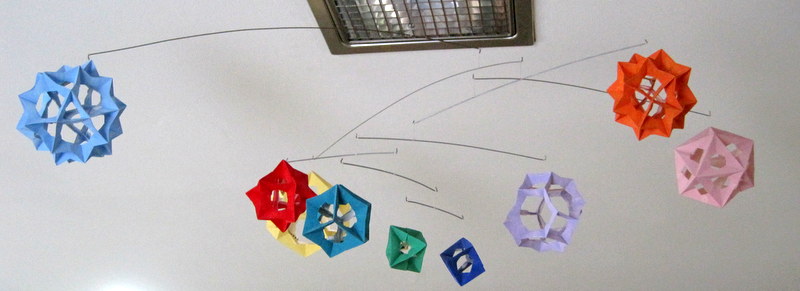
The blue one on the right was made using triangles, and is based on Buckyball geometry. It uses 60 triangles. There is an Archimedean solid with 90 vertexes, but I haven't mustered the ambition to try to make one!
Shapes like these can be displayed by themselves, but I like to make mobiles, and these are light so they make ideal mobile danglers.


No comments:
Post a Comment