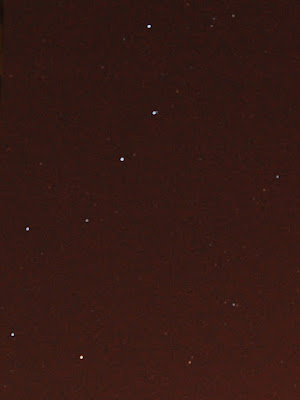
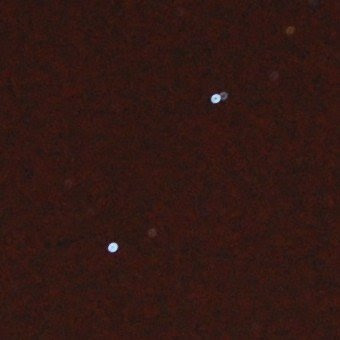
 This morning, I was out very early, and saw Ursa Major high in the sky. I couldn't resist grabbing my tripod and camera to see what kind of picture I could get. I did this very fast because the temperature was 20°F (-7°C), which is risky for the LCD screen in a digital camera. This is a crop from the middle of the image I took.
Particulars: ISO set to 1600, 18mm f.l., f/3.5 (5mm aperture), 30 seconds. I hand-set the lens to infinity, back-setting it from the inner stop a little because autofocus lenses can go "beyond infinity", which allows them to hunt for a focus point at or near infinity. As we'll see below, I still haven't got this quite right.
The red background color is skyglow from the city lights, though I live about five miles outside city limits. This shows that, in my location, the exposure parameters above are the maximum I can accomplish. I need to find a darker location for sky shots!
 This crop shows the bokeh circles caused by my being a little out of focus. The upper bright star is Mizar, partly hiding dimmer Alcor. This is the best-known double star, and is a good test of eyesight. The lower bright star is Alioth.
There is an actual benefit to being not quite in focus. True star images are larger than the speckles in the skyglow!
From the number of faint stars visible, I estimate that the image records stars as faint as Magnitude 5 or 5.5; I doubt any 6th magnitude stars can be clearly discerned.
Professional astronomers using film (many still do) will overexpose a plate so that the skyglow reaches a density between 0.5 and 1.0 (Density is logarithmic, so such a plate looks pretty dark, passing between 1/3 and 1/10 of incident light). This serves to smooth out the skyglow to the point that faint stars are easier to discern against it, plus adding a great deal to the amount of light recorded from those faint stars, compared to a shorter, more "aesthetic" exposure.
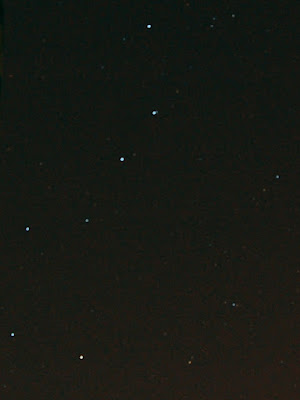
 This is the same as the top image, processed to remove the excess red from the skyglow, so it looks more like what the eye sees (the camera is more sensitive to both red and blue than the eye is). The colors of the stars are still approximately correct.
Without the red haze to distract the eye, I find it easier to pick out the stars. Remember, you can click on any of these images to pull up the larger image behind it.
From the top, the seven "dipper" stars are Alkaid, Mizar (with nearby Alcor), Alioth, Megrez, Phecda, Merak, and Dubhe. A little dimmer, but quite distinct, the three brightest stars along the right side of the image are in the constellation Draco; from the top, Thuban, Kappa Draconis, and Giauzar. Dubhe is seen as yellowish, Kappa Drac and Aklaid as bluish, compared to the others.
I have had the ambition for many years to produce a photographic sky atlas for myself. When comets Hyakutake and Hale-Bopp were here, I photographed them using film with an ISO of 1600, and exposures up to a minute in length. I noticed that the pictures showed quite a few stars that I don't see by eye, even with a rather wide-angle lens.
Fast films are subject to reciprocity failure. I estimate that the actual ISO of the film I was using was 400-600 for a one-minute exposure. Digital sensors have no reciprocity problems, and the amount of skyglow I recorded in a half minute is very similar to a one-minute exposure at f/4 on film, when I shot Comet Hyakutake this time of year in 1996. I think I have verified that I can photograph things I cannot see, so it's time to schedule a vacation to somewhere with a dark sky … during warmer weather!
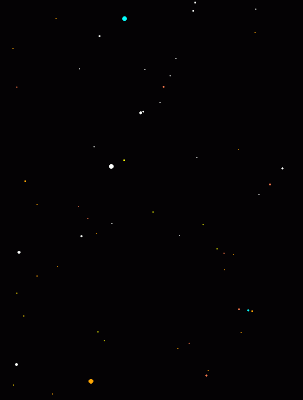
 This is a clip from the CyberSky program, which I used to verify star positions. The colors it shows are exaggerated. I set it to show stars to magnitude 6.0. There are just a few stars in this image which I cannot clearly identify in my photo. This also indicates that I am recording stars to M5+.
Now I just have to get my focusing right!


No comments:
Post a Comment