OK, if you like to edit digital photos, then before you go any further, go to /www.irfanview.com/ and download IrfanView. I use it almost daily.
A book I'll soon review contains mostly photos. In the past, I've used scanned photos in the blog, and I did a lot of work on them for viewing on the computer. My scanner has a "descreen" option, but I found I could use a few steps in IrfanView and get a better result. The following procedure is to completely descreen an image scanned from a halftone print. The example image is a 2-tone Sepia-toned reproduction of an old photo, but the method is the same for monotone or full color.
Halftone on glossy pages such as a magazine or photo-oriented book has from one to four (sometimes seven) hexagonal dot patterns with a pitch of 120 to 180 dots per inch; 150 dpi is most common at present. Halftone on newspaper pages and other non-shiny paper has a pitch of 80 to 120 dpi; 100 dpi is most common. There is a whole discipline of picking the angles for the different screens so they won't produce unsightly Moiré patterns (interference banding). So it makes no sense to try for a final image with more than 100 or 150 dots per inch.
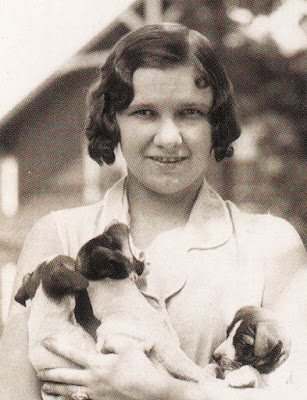 To descreen, one must begin with lots of resolution; much of it will be discarded in stages, but it is needed at first. I scan at 600 dpi. This seemingly large image is a 1.33x1.75 inch clip from a larger image on the book's page. At 600 dpi, full size is 797x1039 pixels.
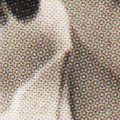 This 120x120 clip from the image, with a corner of the girl's mouth at upper right, shows the halftone pattern well. If you click on the larger image, you'll see the pattern over the whole image when it is shown at full size. The "circly" pattern is a very small moiré pattern of the black and brown screens overlaid at an angle (I think it is 37°). This amount of interference cannot be avoided.
Of course, the "proper" way to descreen such an image is to use Fourier series filtering. It doesn't simply remove all frequencies higher than, say, 80 dpi; it removes the specific frequencies that pertain to the screen patterns, leaving some extra photo detail visible. It is thus better than both the descreen routine in my scanner and this procedure, but for most purposes our process will be sufficient. Those with the extra energy can get Fourier analysis software...it doesn't come cheap or easy.
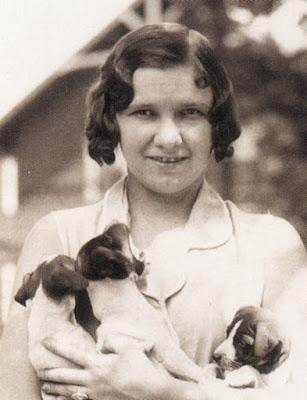 The first step is to do a basic, full blur. In IrfanView I enter Ctrl+E (Menu Image/Effects/Effects browser...), select the Blur item and set the amount to 99. This causes complete mixing within a 1-pixel range. If you look carefully at this image, it has a smoother look.
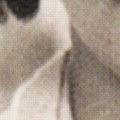 This 120x120 clip shows that it is indeed smoother, the photo details look good, but some halftone remains.
For many purposes you can reduce this image to ¼ size so it is displayed at 150 dpi (or 50% larger than "life" on a 100 dpi monitor and 2x on a 75 dpi older monitor). In IrfanView, Ctrl+R (Menu Image/Resize) selects Resize where you can single-click a half-size reduction or enter any percent (use 25% for quarter size). Also, I use the slowest resize filter for best results; there are several in a panel on the Resize dialog.
However, I like a little better final results with no halftone remaining, so I blur twice more. Once at this size and once at an intermediate size.
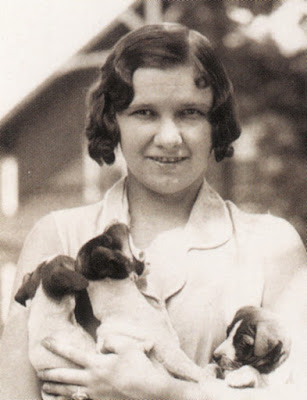 This image results from repeating the Blur step.
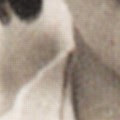 This 120x120 clip shows that some remnant of halftone patterning remains. This is better removed by resizing and blurring again.
Some day I'll take the time to run a few pix through this process, then do it again skipping this blur step, to see how it impacts the final image.
A test image that I took using the scanner's Descreen option looked rather good at the outset (the scanner delivered a 300 dpi image). I blurred it once, reduced by half for 150 dpi, and it looked as good as a result from this process. However, to Descreen, the scanner scans in a peculiar version of 1200 dpi, capturing each color separately, so it takes much longer than an "ordinary" 600 dpi scan. I guess I prefer to be "doing something" for the same amount of time, such as fiddling with IrfanView! So, I do more steps.
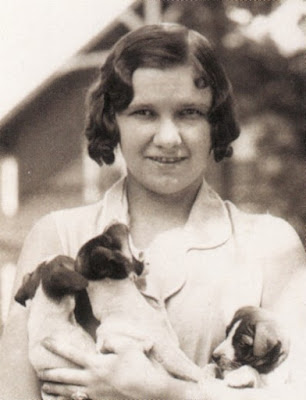 Though this image is displayed the same size as the ones above, it is half the size "behind the scenes." Click on it and see. The resize averaging makes this look a little better than the prior image already, at this size.
 This 60x60 clip covers the same area on the photo as the 120x120 clips above. The halftone patterning is less evident yet, just from the Resize operation.
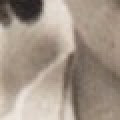 This is the clip above, resized to 120x120 without smoothing, to show the pixels. Compare it to the clip for the prior photo, the result of two Blur operations. I have to look closely to see remnants of the halftoning.
I encourage you to experiment. I had a little theory to drive me; I knew in a general way what the Blur operation does, for example. It may be that starting with a 300 dpi scan and using fewer Blur steps, perhaps at a % different from 99, will work as well. I am usually in production mode, so I must consciously block out time to experiment or I don't do any.
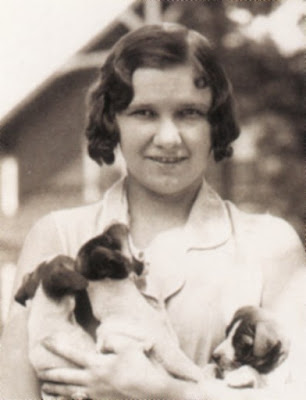 This is the result of the last Blur operation, done on the half-size image.
 A 60x60 clip shows things are a lot smoother, but some irregularities in the girl's complexion seem to have vanished. She may prefer for us to hide signs of acne or moles, but let's wait for the final result.
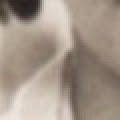 This is again the small clip resized to 120x120 to show the pixels.
I can see no hint of halftone patterns, not even the Moiré patterning. However, the edges are no longer as sharp as before.
We will be shrinking this image further, to get it to final dimensions and resolution. Remember, our goal is to display at 150 dpi, and this is still at 300 dpi.
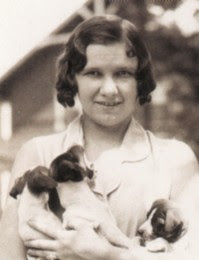 This one ought to display at a smaller size than the ones above. This is now ¼ the size of the initial scan.
 A 30x30 clip shows we have a pretty sharp image now, for this resolution, with no sign of the original halftone.
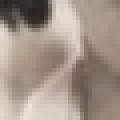 This 120x120 blowup of the tiny clip above shows the pixels. You can see that the edges are just two pixels across.
Many times, you can stop right here. At the risk of resurrecting some sign of the screens, I like to do a final sharpening step. Most of the time, I like the result better.
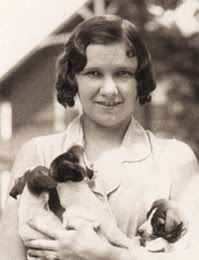 In the Effects Browser you can set the amount of Sharpening to do. I usually set it at 20%. Irfanview does a full sharpening (100%), which you can try to see how blocky it looks. But when you add 20% of that to 80% of the original image, it looks pretty good. This is my final, production image. Overall, there is a somewhat grainy look that makes this more like a photo than a halftone print.
 The 30x30 clip is now displayed at the same resolution as the larger image. The total image has plenty of snap and interest. And let's remember that this started as a stamp-sized snip from a 3½x5 inch image.
 This blowup of the 30x30 to 120x120 shows that the apparent width of edges is closer to a single pixel, as would be the case if we'd scanned at 150 dpi an original photo that had hundreds of dpi. Because of the halftone image we started with, 150 dpi is actually better than is warranted, but it gives a good combination of "look" and size.
There you have it. Start at 600 dpi, then Blur, Blur, reduce by half, Blur, reduce by half again (to ¼ size), Sharpen, and you're done. It really doesn't take long!


8 comments:
Although I have scanning software which will descreen, I find that by using the "shortcut" method (In Irfanview, Start at 600 dpi, then Blur, Blur, reduce by half, Blur, reduce by half again (to ¼ size), Sharpen) the descreening is carried out much more quickly and with no need for experimentation with the level of descreening.
I will continue to use this method in future.
Thank you for posting this. I was in the process of writing a book for a publisher who wanted photos descreened. My scanner didn't have the option. Using your instructions, I was able to descreen several valuable photos and get them in the book.
one time I had scanning software that would just do this by checking a box... why the heck don't these scanner people wise up? just bought an HPO officejet and no descreen....... WHY! HP WHY!>?
Absolutely brilliant - thank you.
This method is perfect for some of the older pictures in my collection. Thanks.
works perfect, well done! as a subscript of another script of mine, i made this to call in case of images (some variables are needed in my environment, adjust accordingly):
Echo Off
SetLocal EnableDelayedExpansion
Set Path=%path%;C:\Program Files\IrfanView;C:\Program Files\IrfanView\Plugins
Cd /d src
Start "" i_view64 !Cd!\folder.tif /effect=(1,99) /effect=(1,99) /resize=(50p,50p) /effect=(1,99) /resize=(50p,50p) /sharpen=21 /jpgq=100 /convert=!Cd!\folder.jpg
GIMP is free image manipulation software. There is a free descreen plugin that lets you do the Fourier transform approach.
Post a Comment